
Showing posts with label Creative Corner. Show all posts
Showing posts with label Creative Corner. Show all posts

.jpg)
.jpg)
.jpg)
.jpg)
.jpg)
.jpg)
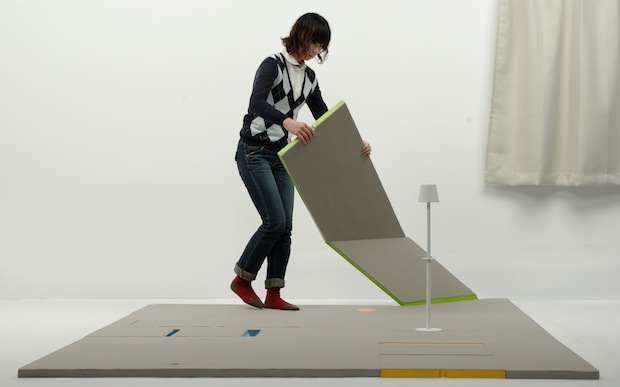
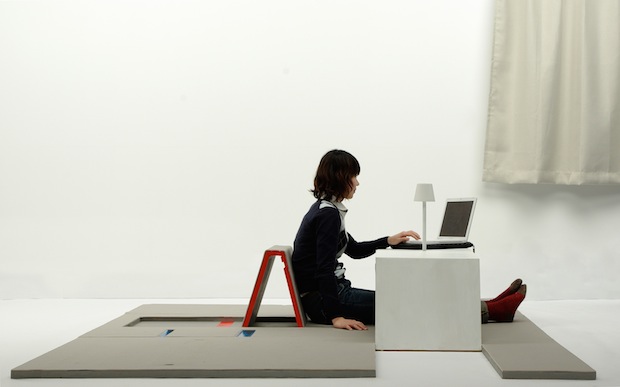
Transformer 3 : A Carpet That Transforms Into Furniture
A brilliant, space-saving design.
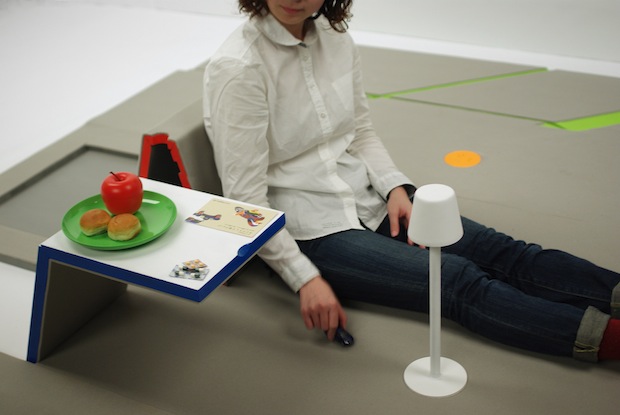
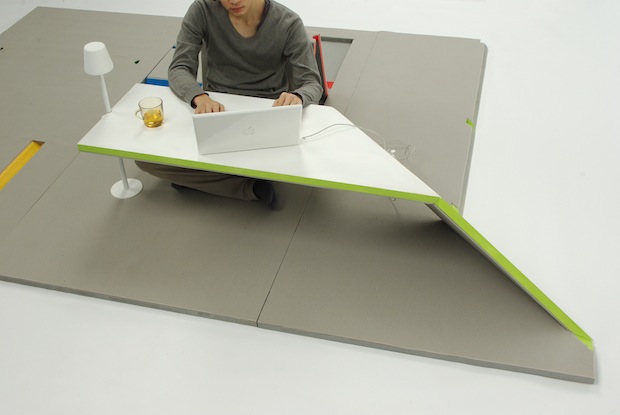
By necessity, the Japanese have an intuition for space-saving design that shines in their products and architecture. But this concept might be one of the cleverest we've ever seen. Created by Shin Yamashita, a student at the Kyoto Institute of Technology, Land Peel is a foam floor covering which also has panels that flip up and fold, to become any sort of furniture you might need: From a table, to a backrest, to a drink tray, to a footrest, to a pillow:
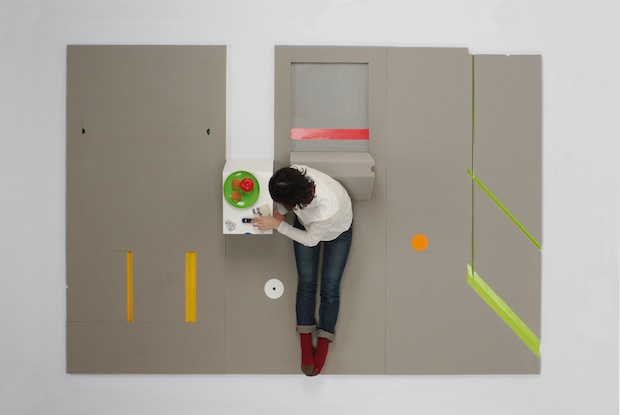
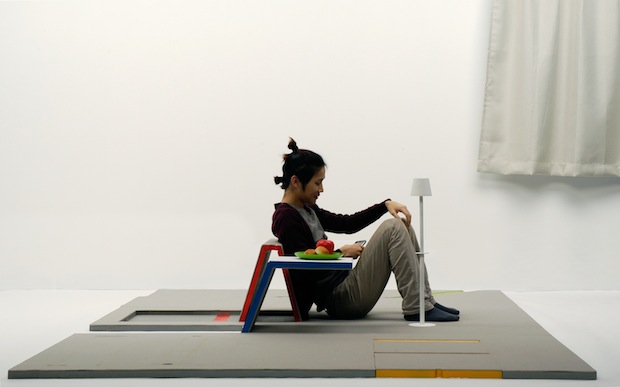
In addition, there's a plug for a custom-fitted lamp, which also serves as a table leg, when extended:
Maybe this would only catch on in Japan, where Tatami mats and floor-sitting are a cultural norm. But consider: The carpet in front of the TV might as well be a piece of furniture, given the way most people actually live. Add a few different skins for different interiors (think: Flor modular carpet tiles), and this could find a huge market.
How to paint a room?
I know this seems to be absurd topic, but i just finished doing that, so thought of sharing.
So let me first tell you about the requirements:
4 Square sheets of Emery paper or Flint paper
6 litres of paint (required for 3-4 coats of paintin 4 walls and ceiling of 100sq.ft. room)
2 paint brush, 1 small.
So here we go.
Firsy choose the paint, Go for plastic paints, the one which are water based, they are easy to dilute and remove as the solvent is water.
The best site I could find to check the shades is www.asianpaints.com.
they have a good color catalogue, as well as amazing pic collection.
Asian paints premium emulsion is good mid-range paint with matt finish.
1 litre will cost you 195 bucks.
So all ready with paints and stuff, get ready with flint paper, and rub the walls, this will loosen the existing paint, and will make the surface rough, so that the new paint sticks firmly.
CAUTION: Cover yourself properly before doing this, protect your eyes, and dont forget to switch your fan off, as you dont want to reduce your visibility level to 3 ft :P
After rubbing is done, let the dust settle down, remove it by cleaning the floor. Now wipe the walls with a cloth to remove excess dust.
There you are, the moment you were waiting for, Til now it wil be tiring, but after this it is all fun.
Dilute the paint with 600-650 ml of water (for 1 litre paint), and stir it while pouring th water. be careful to pour water slowly to prevent forming bubbles.
Dip the brush, make sure you dont take excess paint as it will paint the not so required areas. Go for the horizontal strokes. Make 2-3 coats in a gap of 2-3 hours. Trust me its pure fun to see your room walls glowing.
NOTE: Paint the ceiling first (this was the mistake i did, and had to make an additional coat)
Tip: Its better to paint ceiling with a lighter tint of that wall color.
Tip2: To make a tint, add white color to the base color.
Tip3: To make a shade, add black color to the base color.
Tip4: To make a tone, add grey color to the base color.
Here we are..
Don't forget to cover yo floor with plastic spreadsheet else 1 hour wiping will be added to schedule.
Happy painting.
P.S: I will soon upload the pics.


